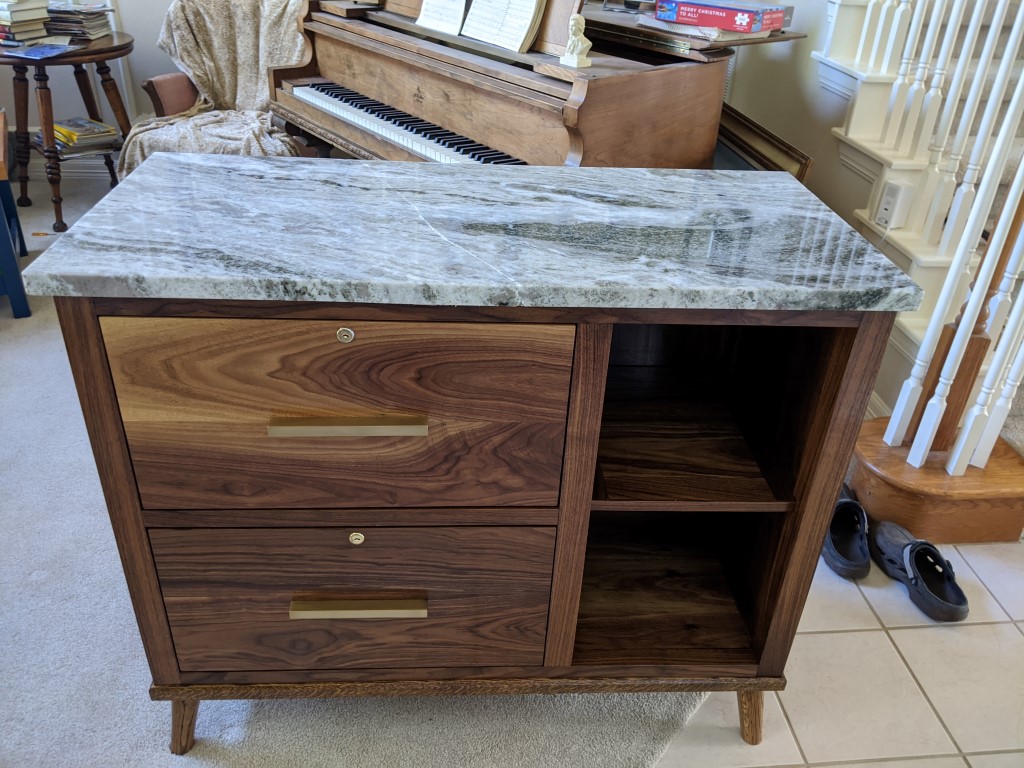
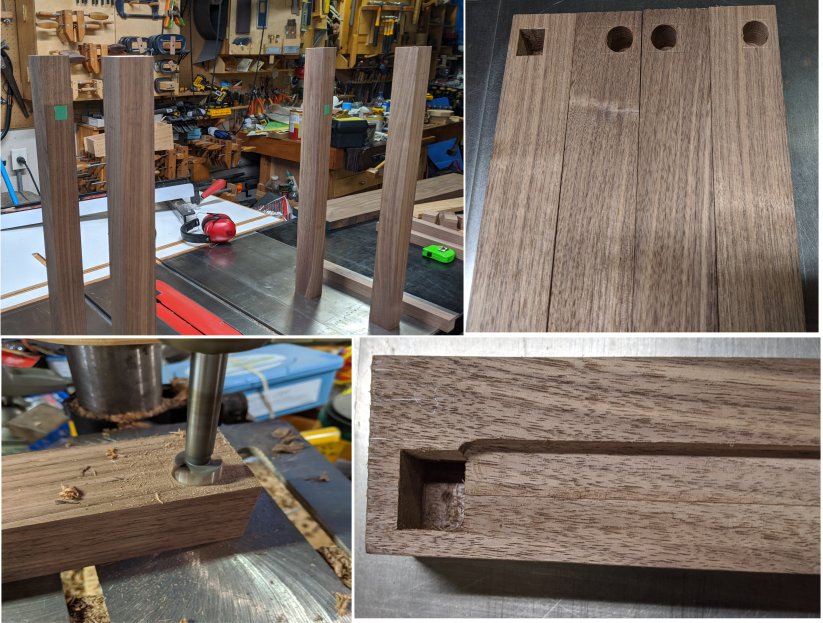
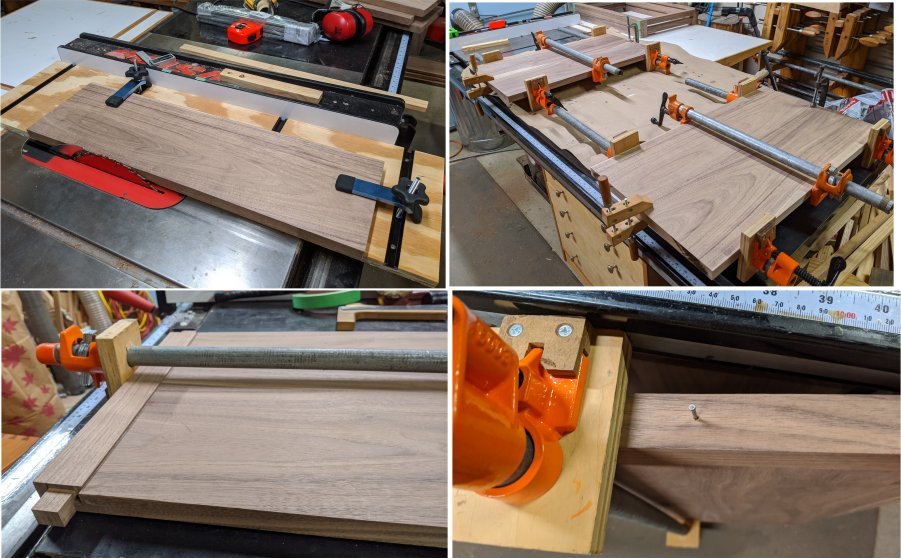
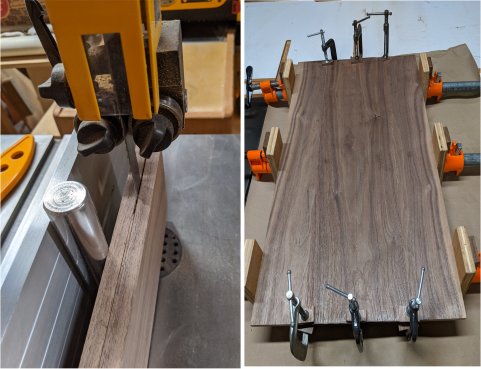
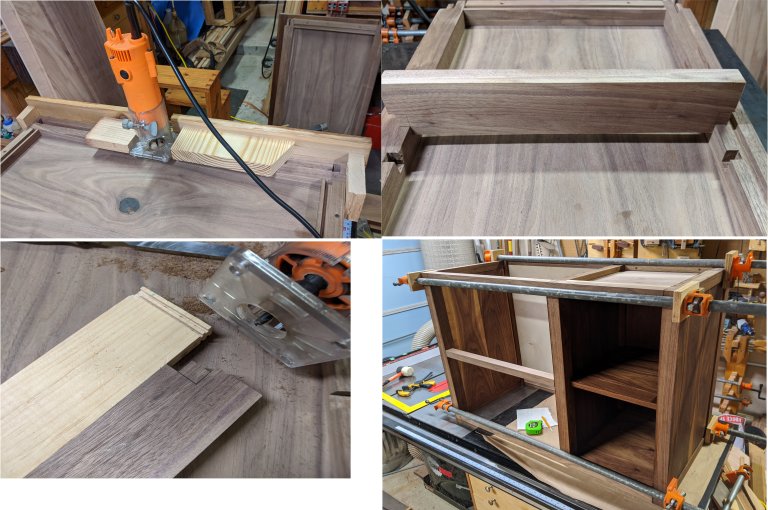
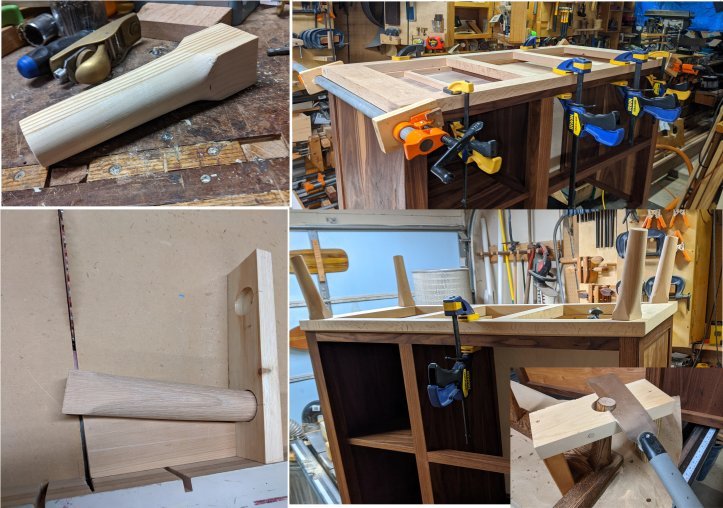
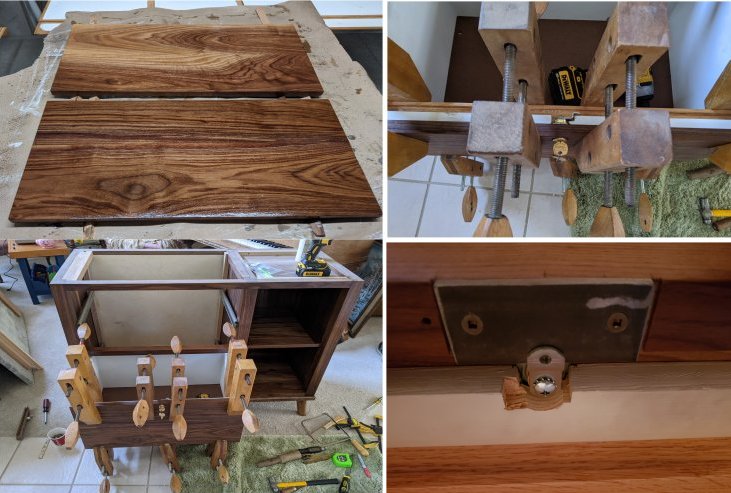
The carcase of this credenza is made from walnet. It has an oak base. File folder storage in drawers, record storage on shelves at right. This has a 3/4 inch marble top with a 3/4 inch overhang on all sides. The top weighs about 110 pounds just by itself.I started building the carcase with the end panels. 8/4 walnut was used for the corner posts, surfaced to 1-7/8 square. A spent a few minutes determining how the faces would be oriented, and then cut mortises for the panel rails, starting with a 3/4 inch forstner bit, and then squaring them up with chisels to a depth of 1 inch. I positioned the top of the mortise 3/8 inch from the end of the posts to prevent breakage during assembly. The rails were fabricated from 6/4 walnut, surfaced to 1-1/2 x 1-1/4. Notice the dado cut in the posts between the top and bottom mortises. This provided an inset for the outer edge of the solid walnut panels. The end panels were cut from 4/4 rough sawn walnut. I used a shop constructed jig to true the edges and then planed them to 3/4 inch. The jig worked well enough that no edge jointing was required for glue-up. The dados in the posts allow the float across the width of the panel for changes in humidity. A single finish nail in the middle of the rail, centers the 3/4 inch panel in its frame. Rabbets were cut along the panel edges to provide a consistent 1/8 inch reveal. The only glue used was in the mortise and tenon joints.A number of interior panels were needed for the divider between file storage and record storage, and the top, bottom, rear, of the record storage compartment. To reduce weight, I re-sawed 4/4 walnut to make the panels.The panel which divides the file storage from the record storage was constructed to mount into mortises cut into the full width top and bottom rails. The tensions extend all the way through the rails. This panel used 1-7/8 square posts like those used in the end panels. It provides considerable structural rigidity to the carcase.The shelf in the record storage compartment was constructed from a mortise and tenon flat frame with a floating panel constructed from 4/4 walnut. The notched edges of the flat frame fit into recesses cut into the center of the four corner posts of the compartment. This resulted in a tricky glue-up. The only glue used was in the rails mortise and tenon joints, but 5 panels had to be positioned precisely in their recesses/dados for the joints to be drawn together. This was begun in the record compartment ( four panels), and then extended into the file compartment (large plywood rear panel).I made a separate base from 6/4 oak (for strength and durability) which attached to the bottom of the carcase. It extends past the bottom the of carcase by 5/16 inch on all sides. The cross members at each side are 5 inches wide. This allowed the square top of the solid oak legs to be inset 3/4 inch deep. Marine epoxy was poured into the cavity and flowed around the splayed legs to provide a rock solid bond. The top of the legs was 2 inch square and tapered to 1-1/4 inch round at the bottom. The legs have a 11 degree tilt to the sides, and a 3 degree tilt to the front or back. I used pine test pieces to to proto-type the angles and placement on the base. The jig in the lower left position the leg to make the compound angled cut with the sled on the table saw. Also note the jig used in the lower right inset, which was used to the bottom of the legs.The file drawers were made from 1/2 inch birch plywood side, and 3/4 inch birch plywood fronts and back. They are attached to the carcase with 16 inch full extension slides. The attached front faces were made from 4/4 walnut surfaced to 3/4 inch. They were attached to the drawer fronts after they drawers were attached to the slides, so they could be precisely centered in the drawer openings. Each drawer was fitted with 1-3/16 cylinder lock. The 1/4 turn lock tab resides behind an 1/8 inch steel plate recessed to the back of the top and middle front rails. Notice the slide supports at the rear of the file compartment. They are notched to support the rear of the full extension slides. They run the entire height of the compartment and are screwed to the posts.
Finishing
All exterior surfaces were first finished with Watco Danish Oil – Natural. This was allowed to dry for a minimum of 72 hours before applying 2 coats of Minwax Polyurethane Satin. The walnut panels had the oil applied as they were completed, since none of the panels were glued.
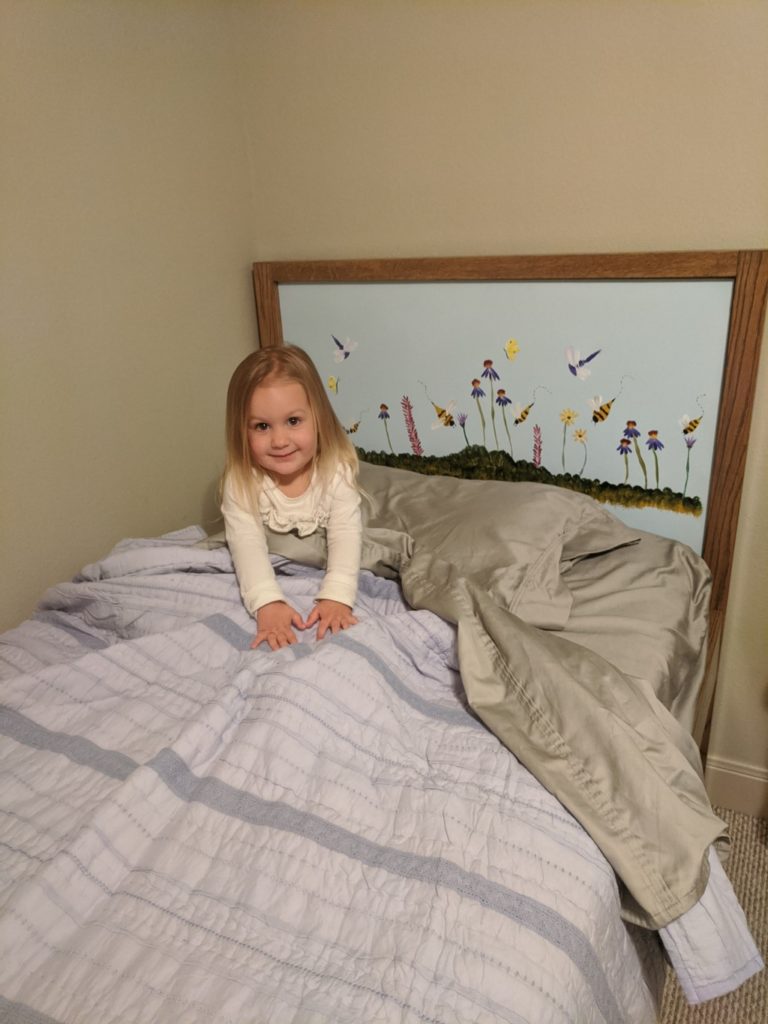
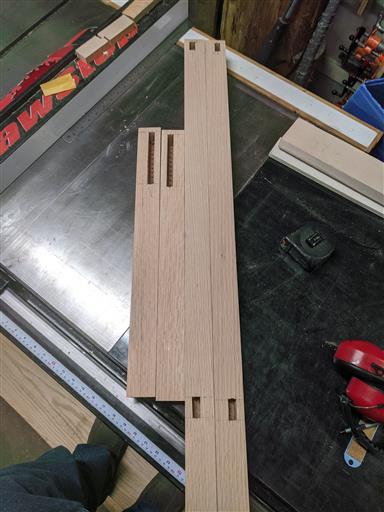
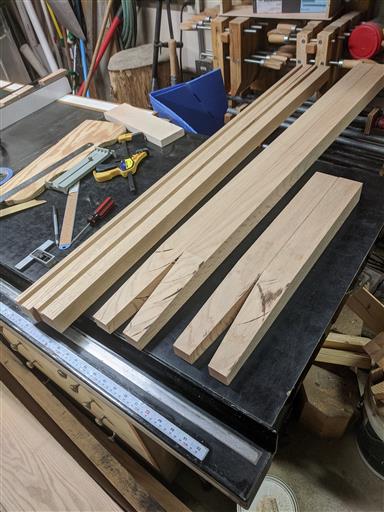
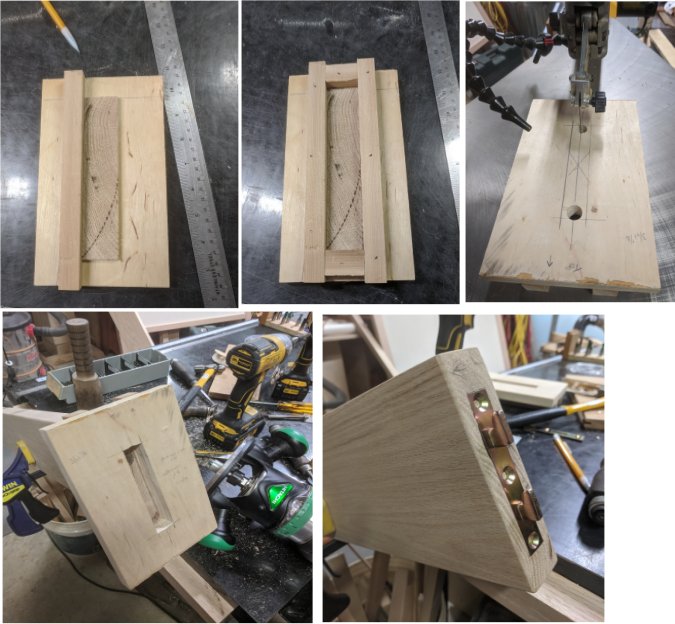
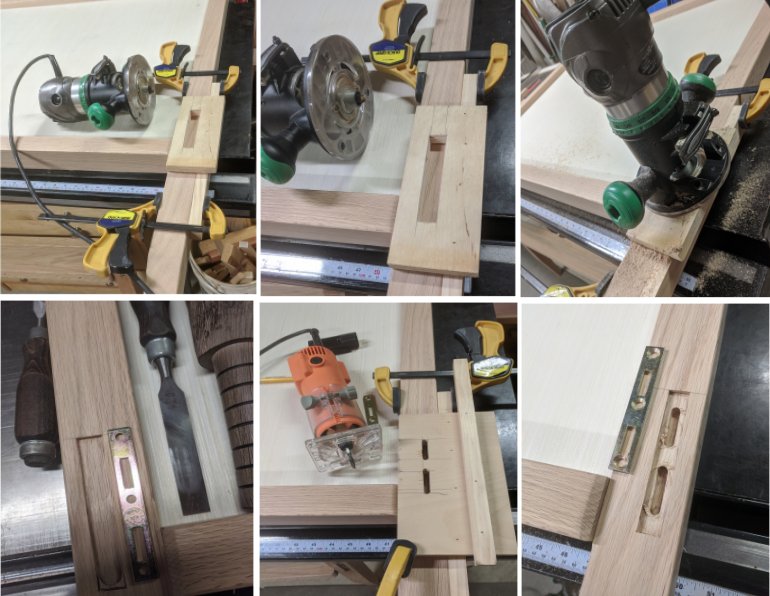
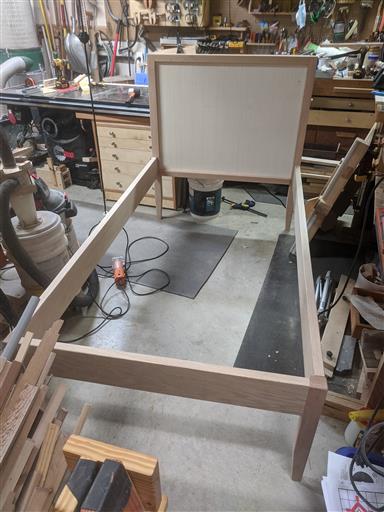
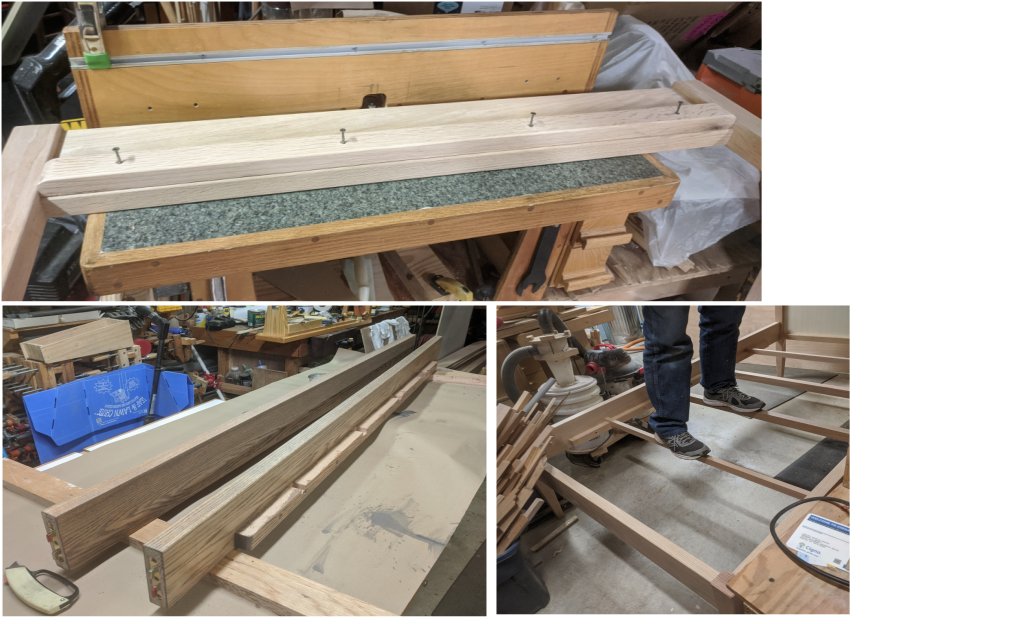
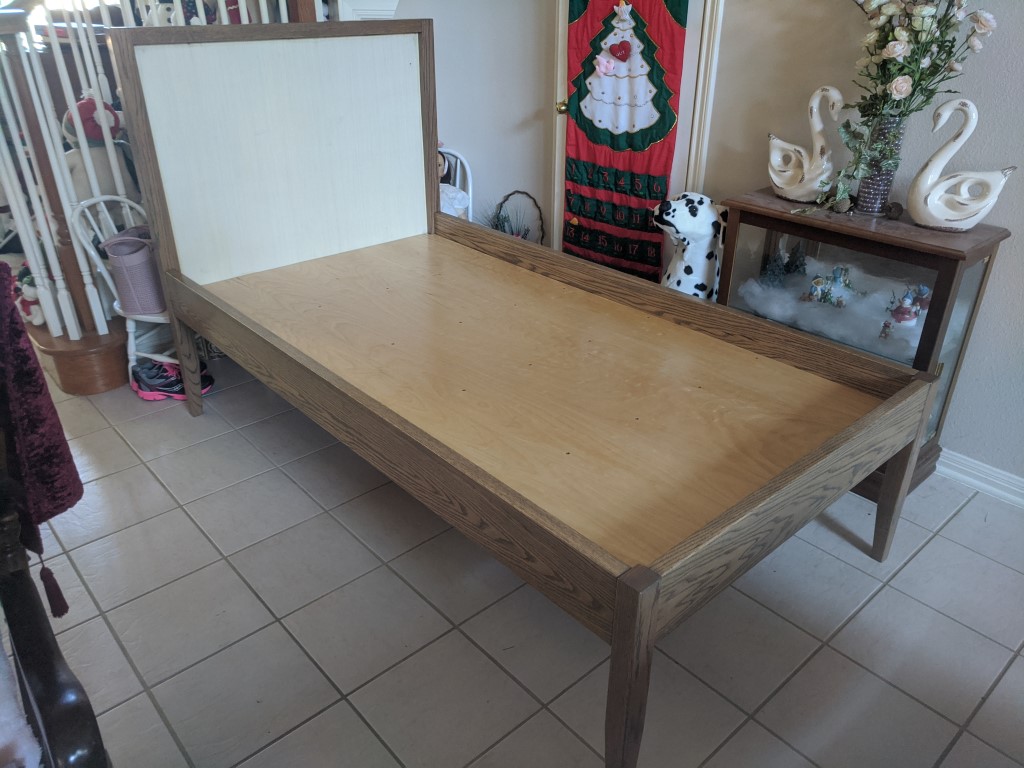
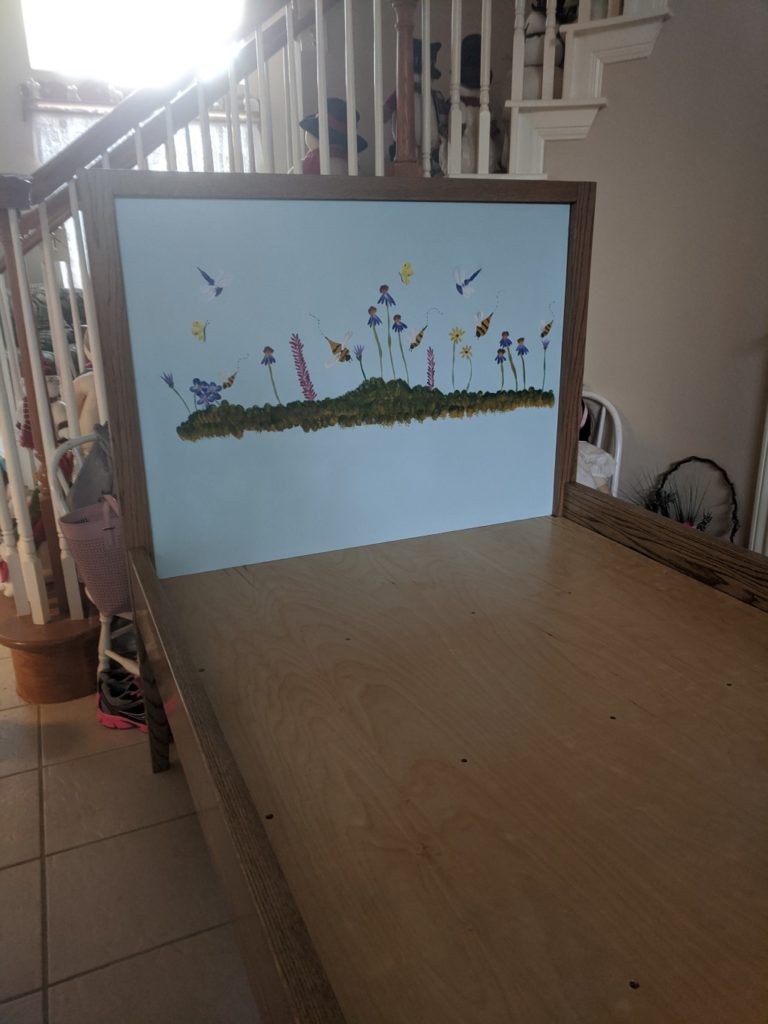
Here is a sturdy twin bed for my granddaughter. The bottom of the rails are 16 inches above the floor to allow storage containers to be stored underneath. The headboard has an insert which can be changed out she grows older and her tastes mature.I started with the corner posts. The mortises are for the foot board and the headboard frame.Here you can see the dados for 1/2 inch birch plywood that is placed in the headboard frame. It provides a backing for removable inserts. The legs have a 8-1/2 inch taper.I used bed rail hardware from Rockler to allow the bed to be disassembled and moved. To make the installation of the hardware easy, I constructed router jigs. I used a cutoff from one of the bed rails to make a frame which allows the jig to fit over the end of the rail. On the other side, I laid out a slot the width of the router bushing to cut the recess for hook portion of the rail hardware.I make two similar jig for the posts. One for the recess of the female hardware component, and the other to cut the slots in which the male hooks from the rail would reside.Here is the basic frame assembled. The hooks are tapered and tighten up as they engage. I was very impressed at how sturdy the frame was.I added supports to the rails and footboard on which the 1/2 inch plywood bottom would rest. The top of the bottom lower rail on the headboard provides the support on that end of the bed. I used 4/4 oak cross supports that fit into the notches on the rail sides. As you can see, they easily support my weight with minimal deflection. I attached the oak strips to the bottom of the plywood bottom with glue and screws to further increase the rigidity of the plywood.Here you can see the plywood bottom inserted. I finished it with two coats of polyurethane so the mattress and sheets would not snag.Here the headboard insert has been installed inside the perimeter of the headboard. It is 5-mm plywood on which Nana painted a scene favored by little girls. It is held in place with two small screws in-obtrusively placed within the painting. As mentioned above, this can be replaced at some time in the future to meet the tastes of the growing child.