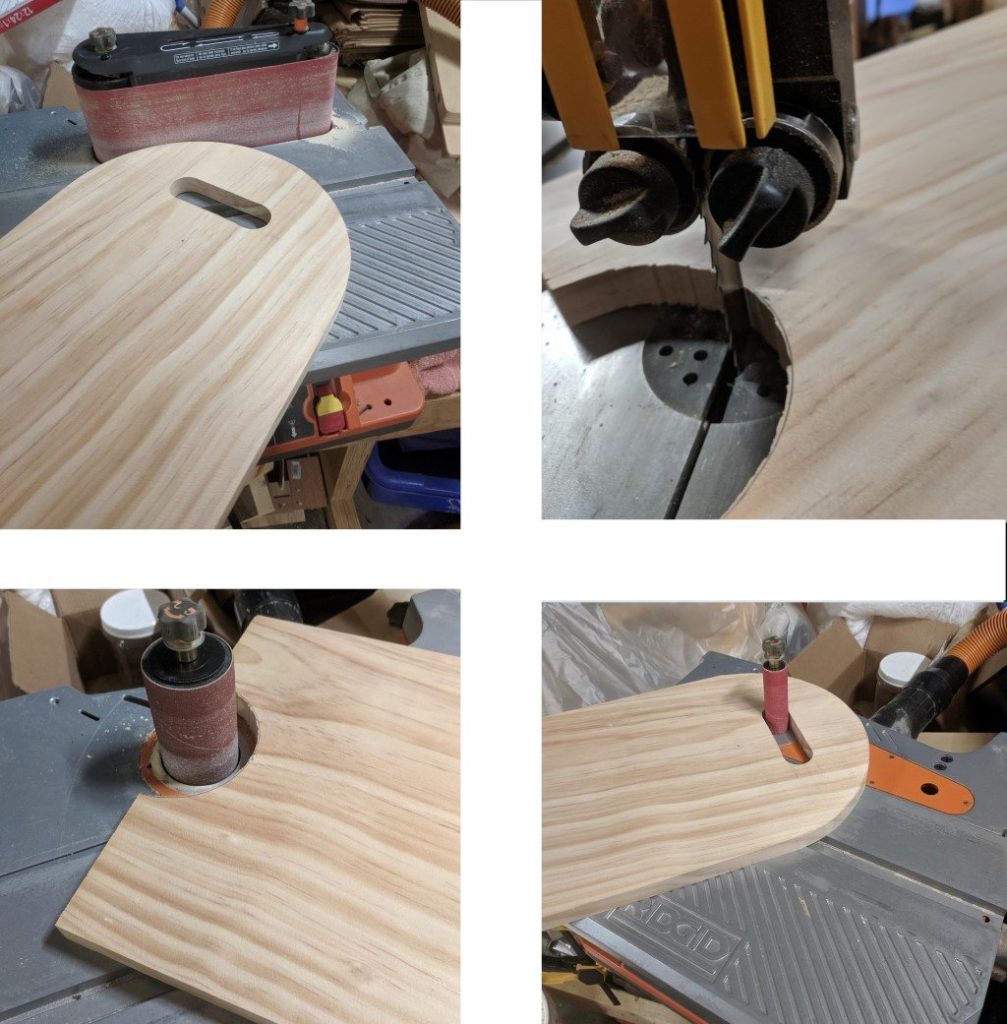
I used a large compass to layout the the top radius and a 1 quart paint can for the bottom radius between the legs.
A band-saw was used to cut the outside curves, but a jig or sabre saw would work fine as well. For the bottom half circle, I made a series of cuts up from the bottom just short of the layout line about 1/2 inch apart. This allowed the waste to fall away as I cut on the waste side of the line with a wide blade.
For the top hand hold I used a 1-1/2 inch forstner bit at each end and then a sabre saw for the upper and lower joining cuts.
A belt sander was used to smooth the upper outside radius, and spindle sanders cleaned up the lower inside radius and the upper handhold.
I used a 1/8 inch round-over bit on all edges.
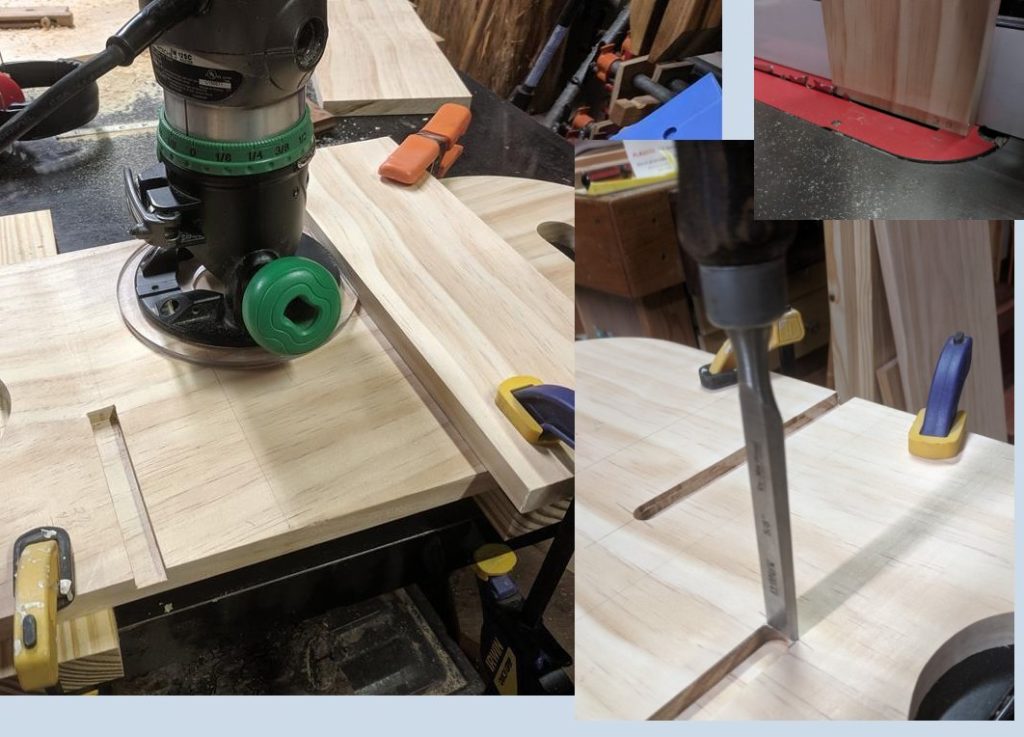
A 5/8 inch router bit was used to cut the stopped dado in the sides. Two passes were made, one at 3/16 and the other at 3/8 inch deep. A chisel was used to square it up.
About 1/16 inch of material was removed from the end of each step to make the tenon. Take the time to make small fence adjustments and sneak up on a snug fit.
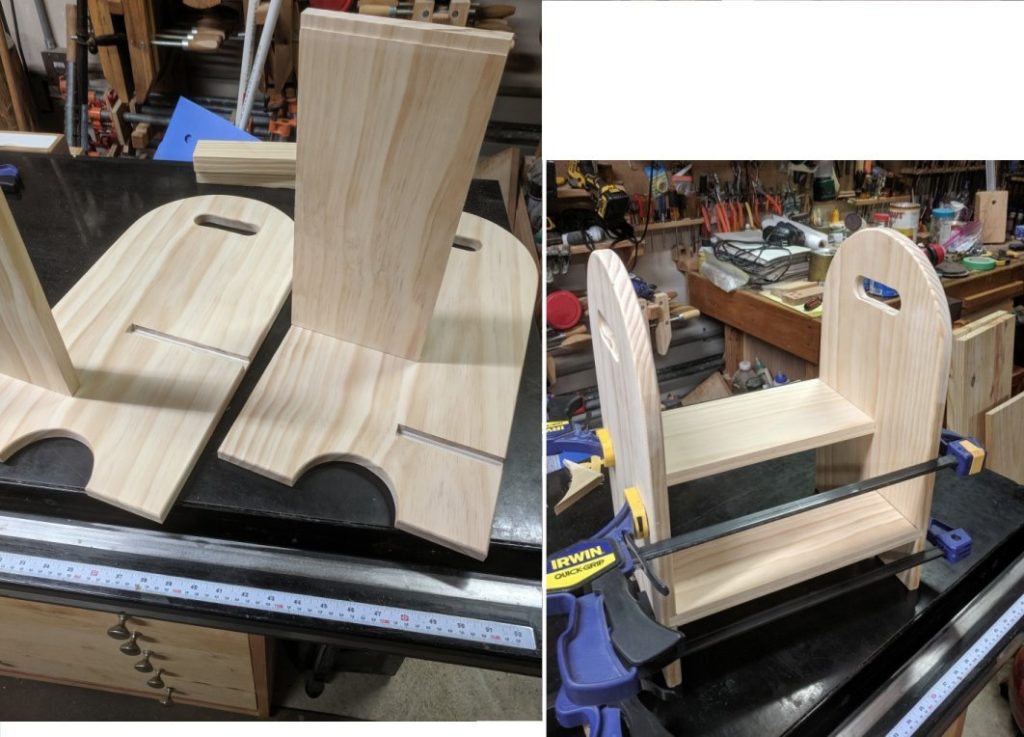
The joints were first glued, then clamped, and finally fastened with a 16 gauge finish nailer. I marked the centers of the joints on the outside to accurately position the nailer. I left the clamps on over night.
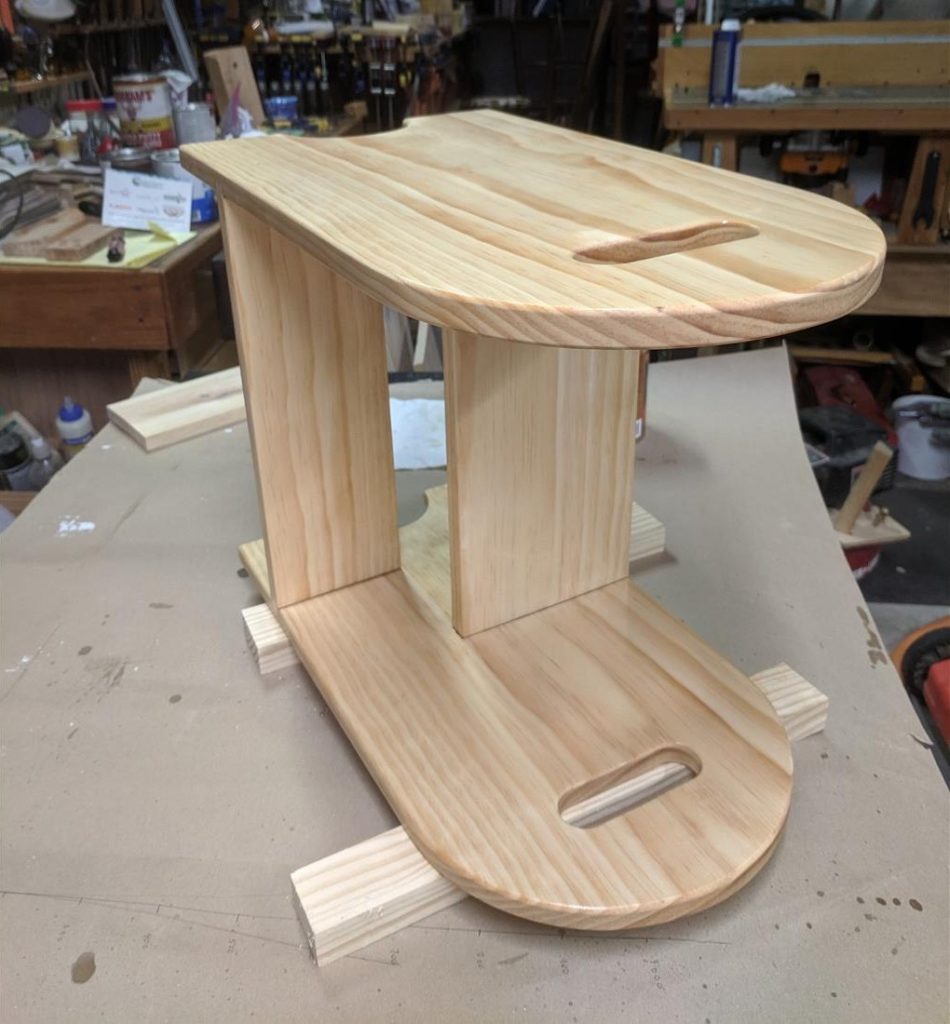
I used a semi-glass polyurethane to finish the stool. I did a light sand between each coat.