
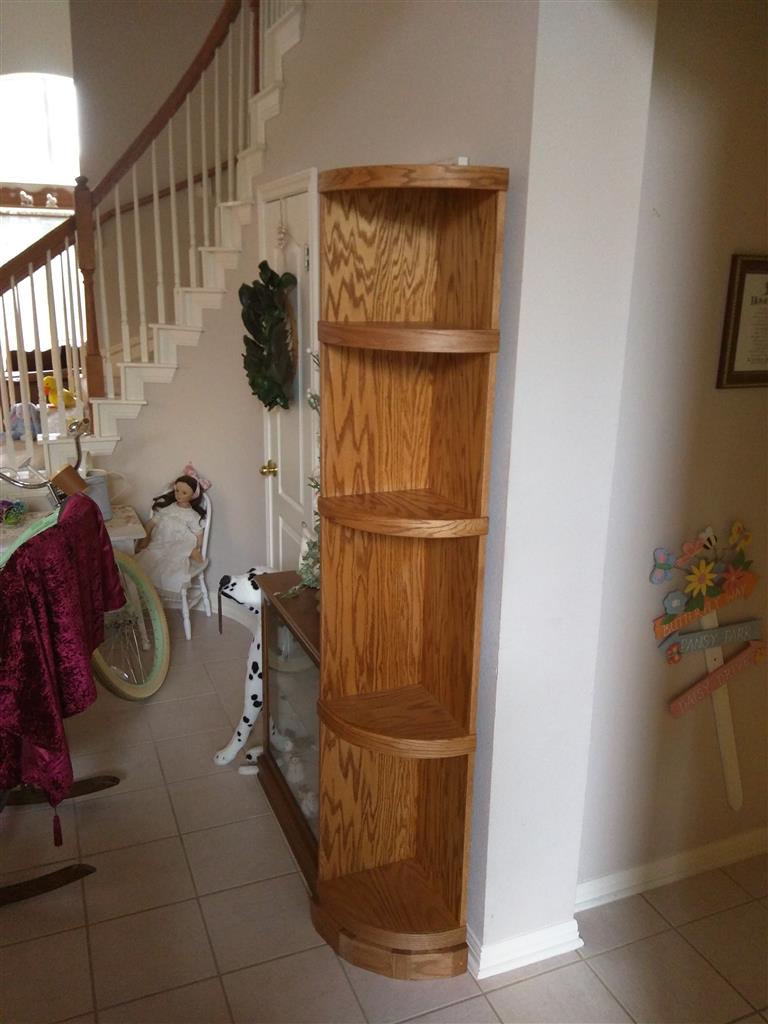
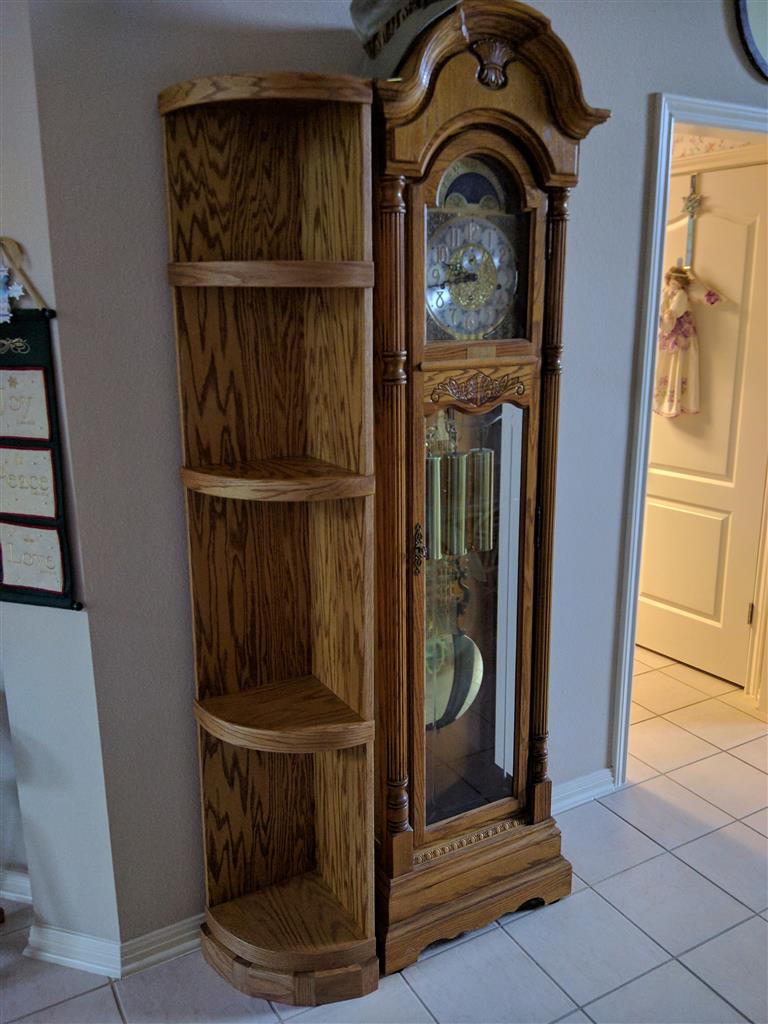
Corner shelves present an interesting exercise in wood bending. Steam bending is best done with air dried lumber, since kiln drying makes the wood fibers brittle. I didn’t have access to air dried oak, so I used a lamination technique.
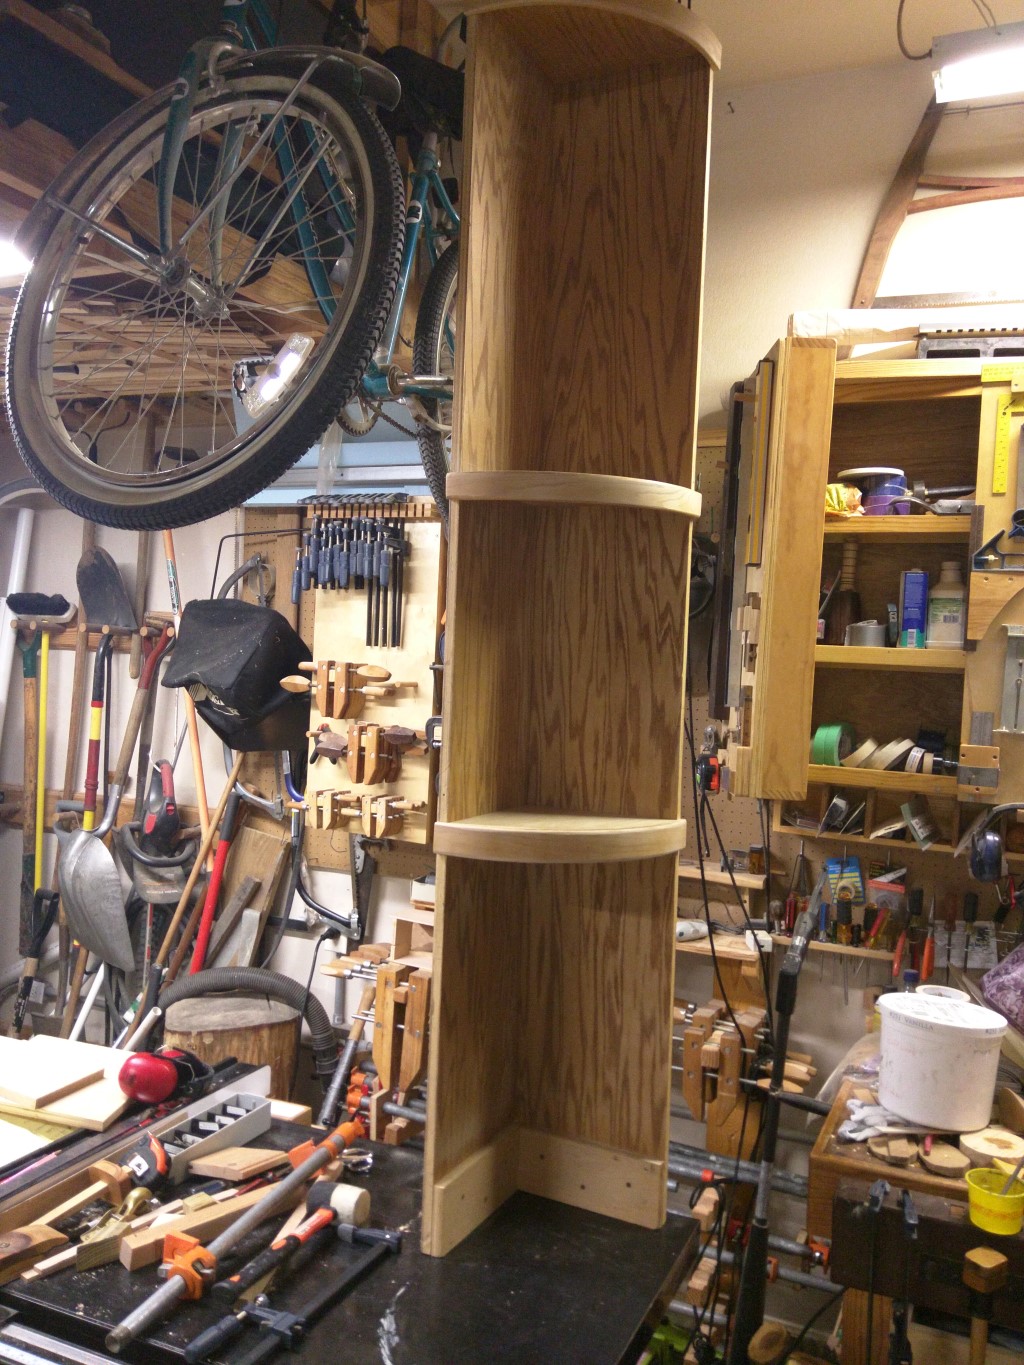
The basic frame consisted of two pieces of oak plywood, jointed at the rear at 90 degrees with a glued rabbet. The additional plywood pieces at the base just elevate the bottom shelf an additional 5 inches above the floor.
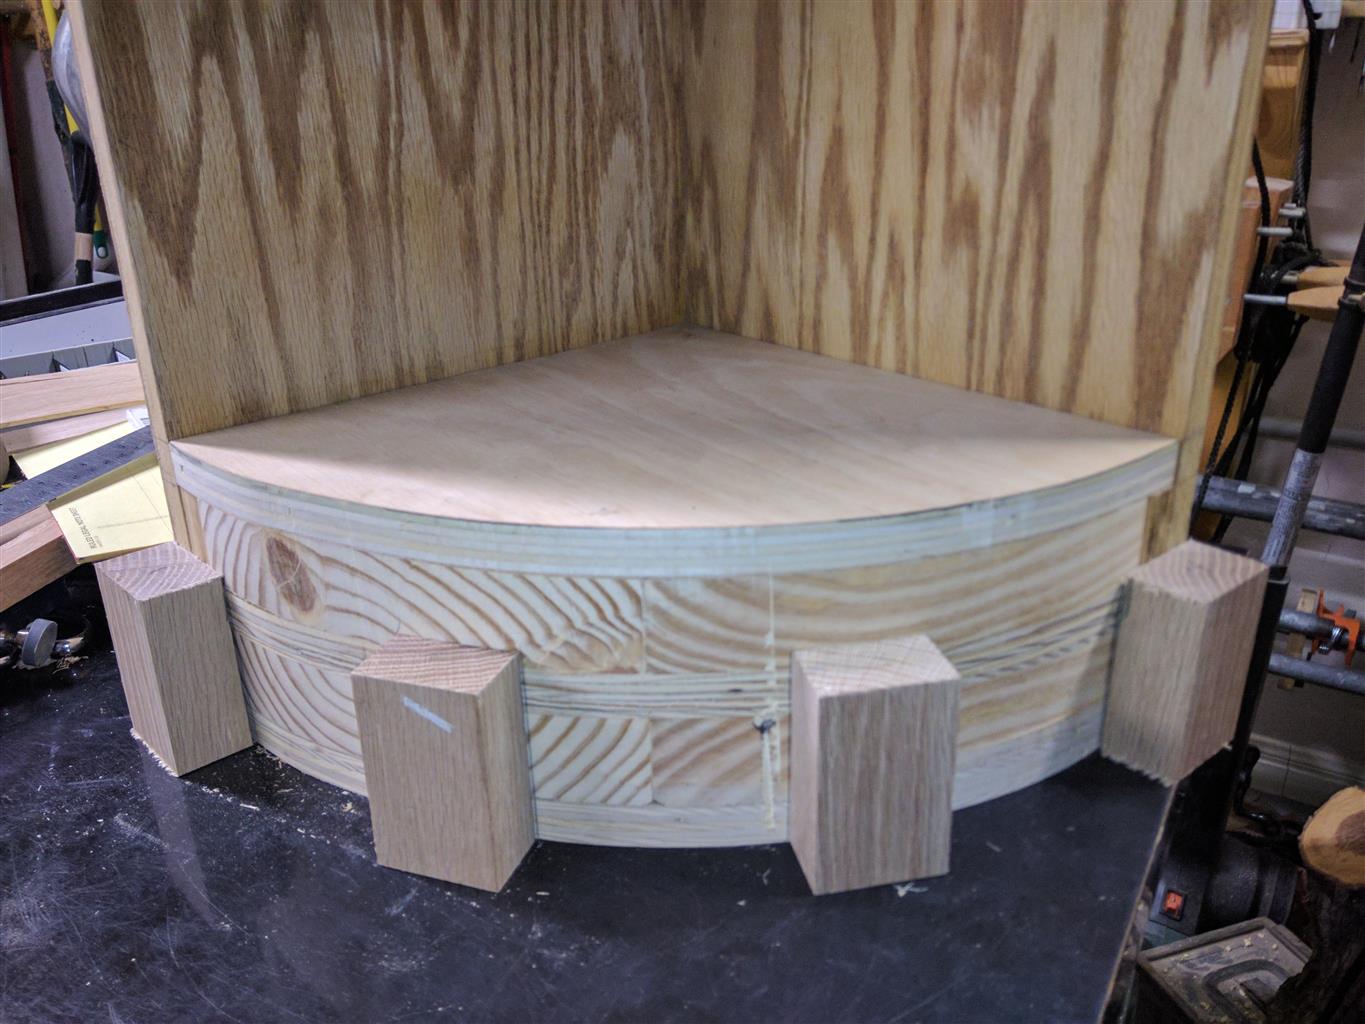
I made a solid base to add weight at the bottom of the piece and make it more stable.
I laminated alternating layers of plywood and 2x lumber to build up the solid base.
A compass made from a piece of string, was used to scribe the arc, which I then cut out on the bandsaw and sanded smooth with a spindle sander.
The bottom-most section was constructed of solid oak segments, glued to the solid base. I did this to further extend the base, and to keep the curved laminate shelf facing from becoming too wide.
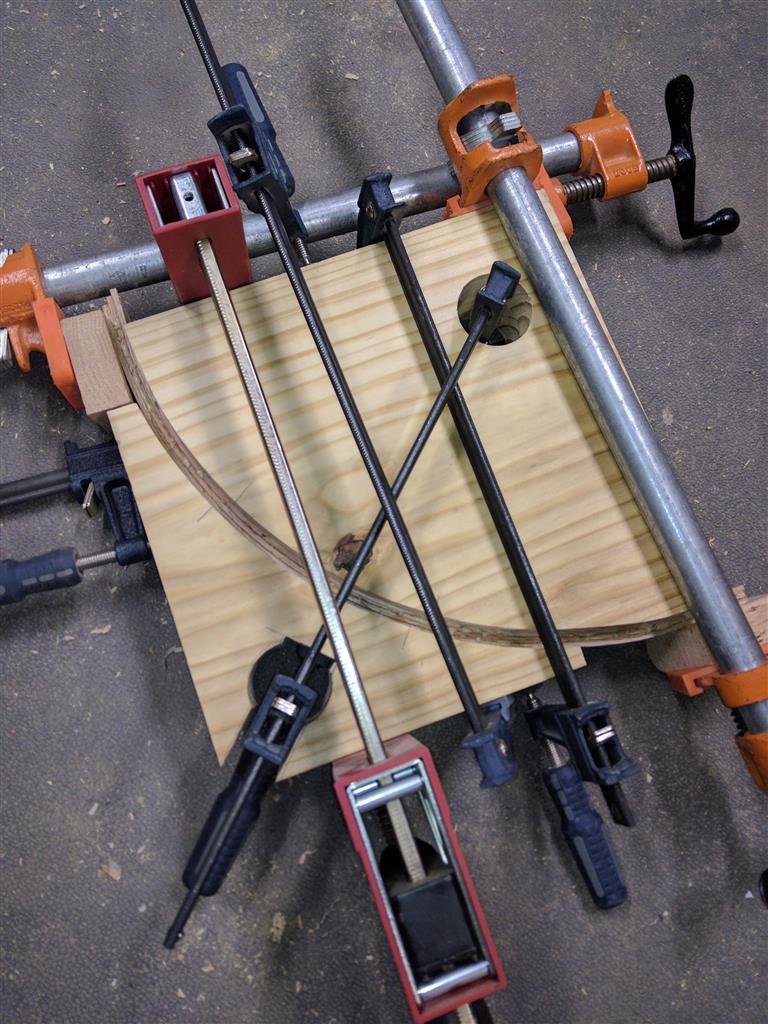
To bend the three one-eighth laminations, I constructed a bending form from two 2×12 layers – glued and screwed together, then cut on the bandsaw and sanded. The outside curve waste becomes the outer section of the form. A 2 inch hole drilled through the inside section of the form provides a camping point.
I glued the three laminations together with titebond III.
Solid clamping blocks were used at the ends to extend the clamping surface and keep the laminations square. I left the the clamps on overnight.
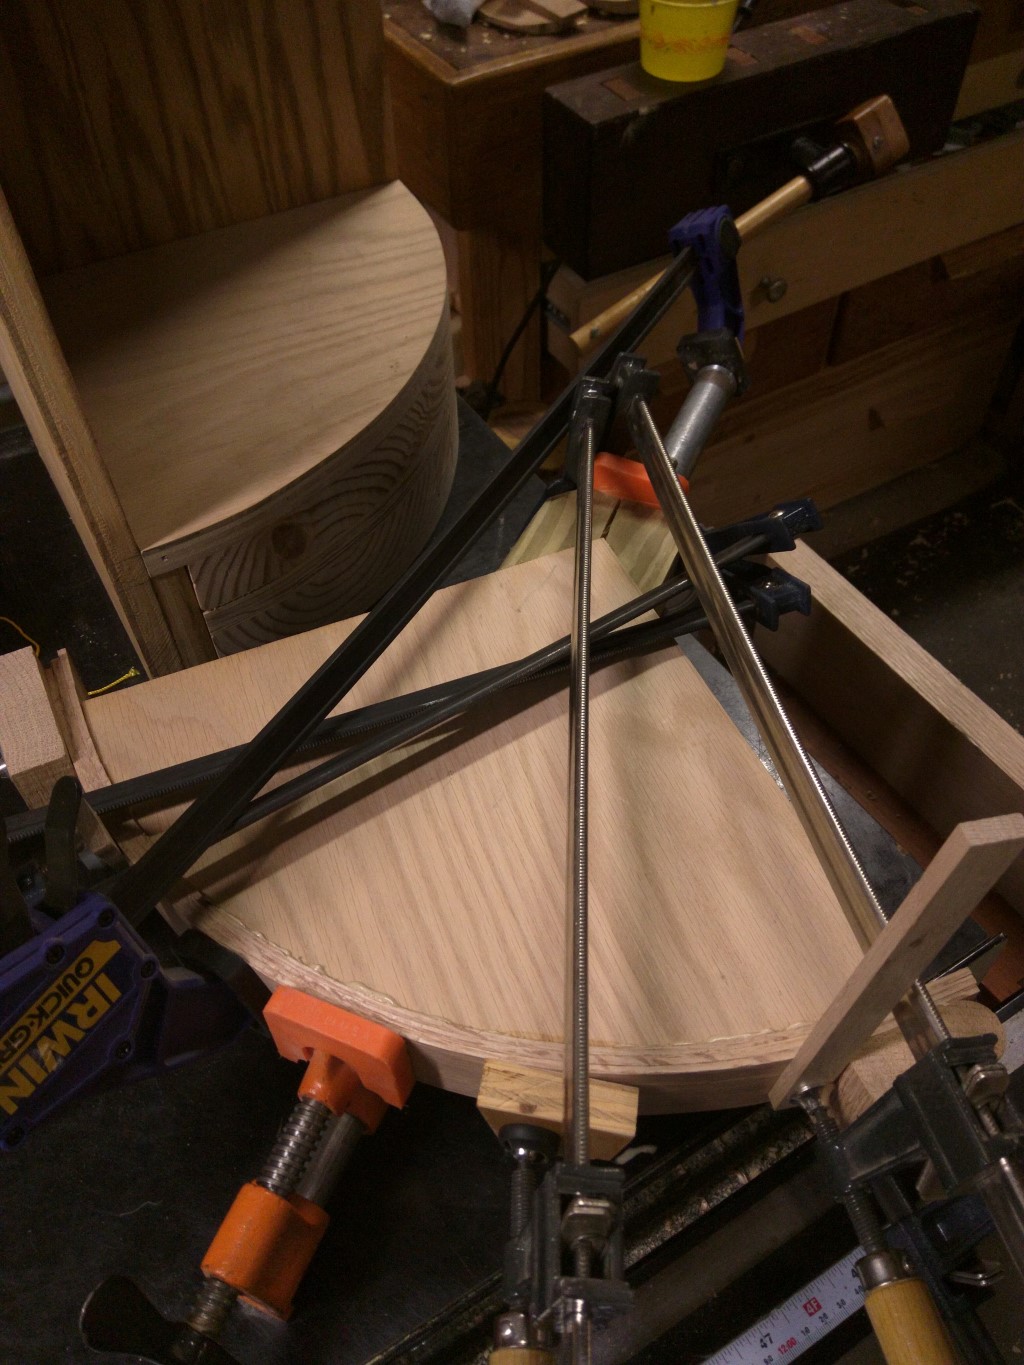
There was some spring-back after removing the bent lamination from the bending form. Clamps were again used to glue the lamination to the front face of the shelf. Start clamping from the center and move towards each end. A v-block was made to provide a flat clamping surface at the rear of the shelf.

Here is what the completed base looked like after filling in-between the oak blocks at the bottom, and adding the bent lamination above it.
After the glue dried, the ends of the bent lamination were cut flush with the back of the plywood sides.
Quarter inch thick oak strips were glued to the plywood edges between the shelves.
I applied Watco Light Oak Danish Oil to the project after sanding to 220 grit.


