Dresser for Levi

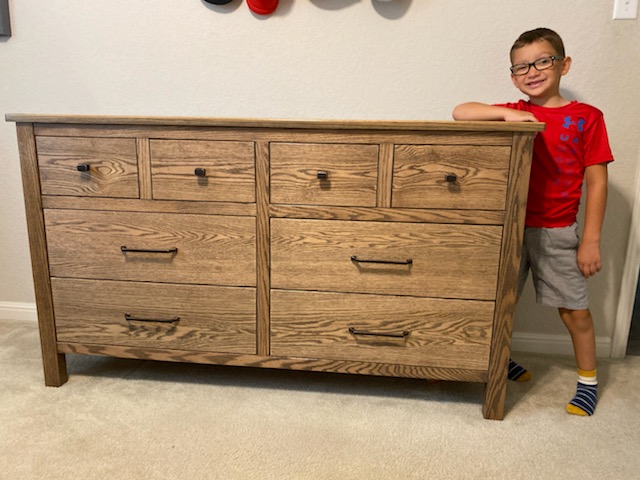
This is very similar to one I built for Little C, except that I extended the posts on the sides to the floor to double as legs. The stain used is 1 part MinWax Provincial to 5 parts MinWax Classic Gray. The front and sides are protected with 3 coats of MinWax Spar Urethane. The top has 5 coats of Varathane Ultimate polyurethane.
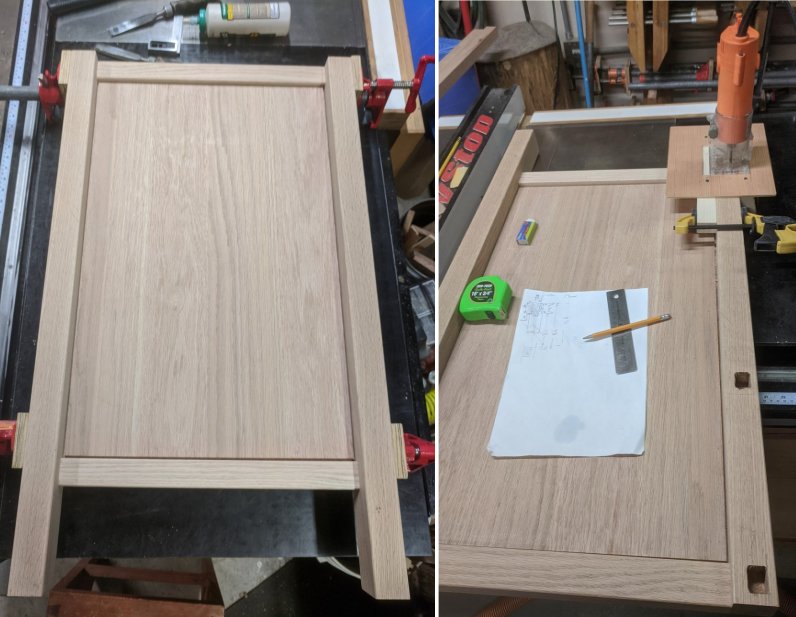
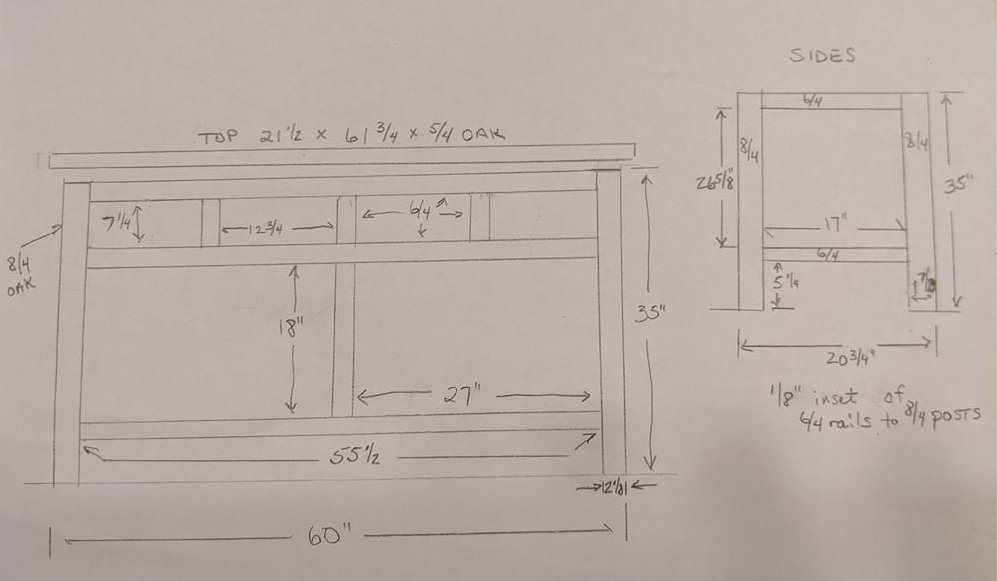
The side panels were constructed first. Vertical posts are 8/4 red oak. Horizontal rails are 6/4 red oak. They are jointed with mortise and tenon. A dado connects the mortises to house the tongues of the solid 4/4 red oak panels. A pin on the back side thru the center of the rail and into the panels holds the panel centered in the dado with space to expand and contract with humidity changes.
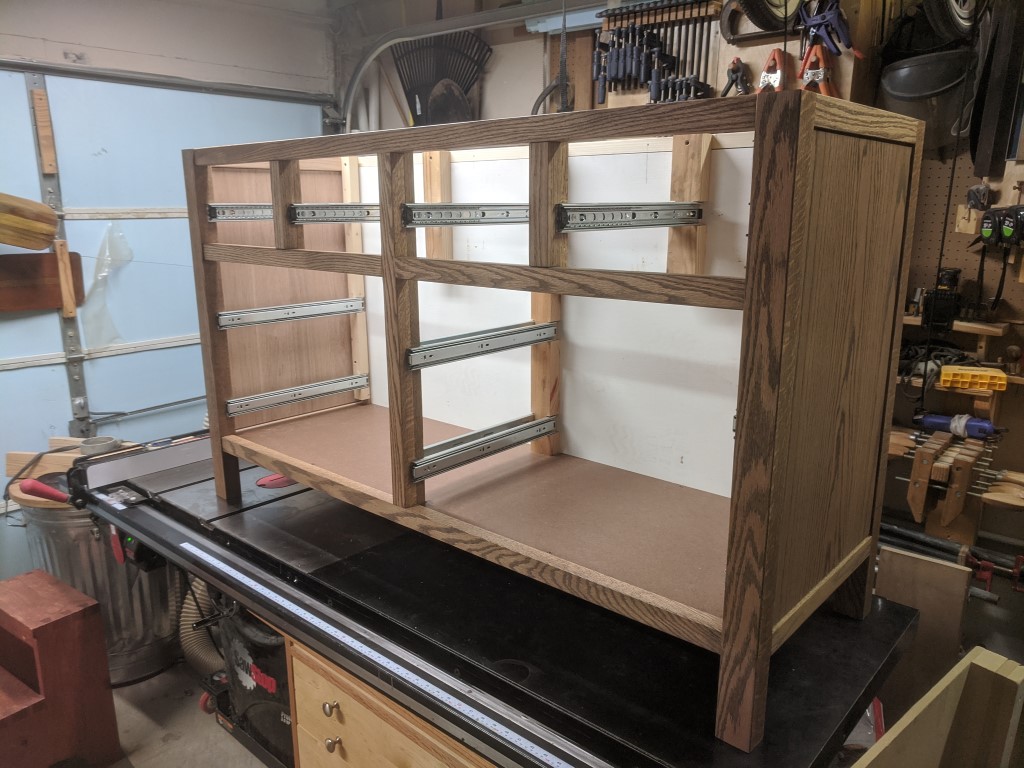
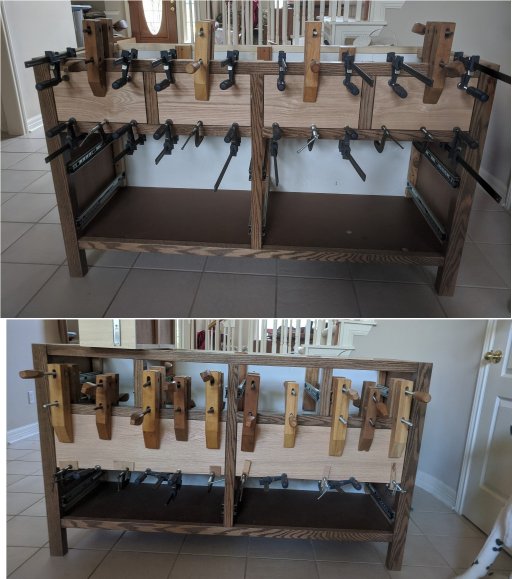
Here is the assembled carcase. Notice the southern yellow pine slide supports at the back. Dados cut into the sides house the the rear of the slides. Pan-head screws at the front of the 100 pound full extension slides are driven into oak added at the rear of the 6/4 mortise and tenon face frame. The back is 1/2 inch birch plywood, set into rabbets cut into the popular 6/4 full width rails. The southern pine supports are secured to the popular rails at the top and to the plywood at the bottom. The floor is 3/16 inch masonite set into a rabbet in the back, and supported by pine braces attached to the oak frame at the front and sides.
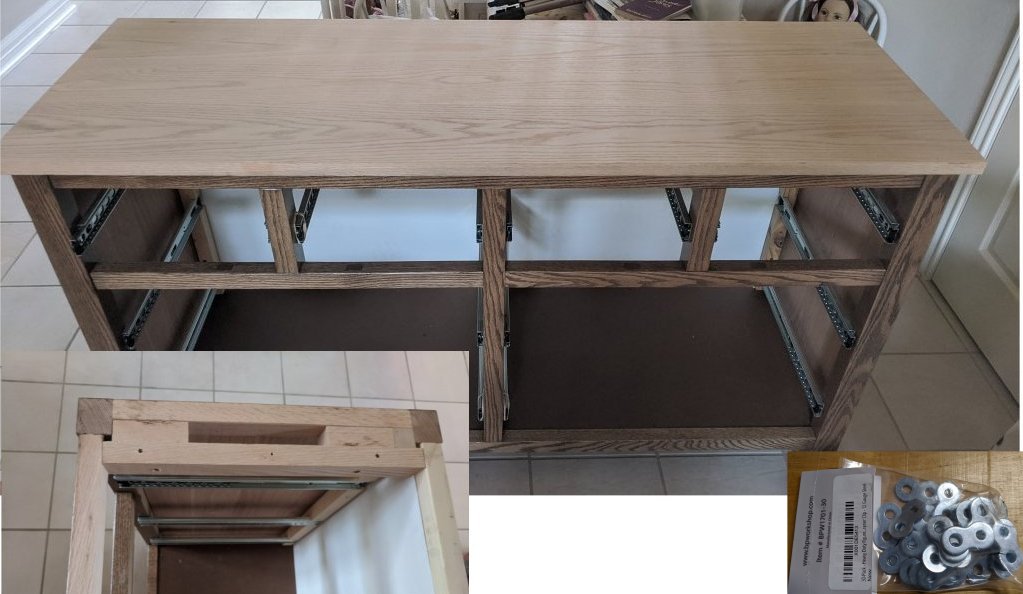
The top extends past the sides about 1 inch, past the front rail 1/2 inch, and is flush at the rear. Oak blocks were added at each side to allow fastening the top with adequate clearance from the slides at each end. A single 2-1/2 inch screw was run up into the 1 inch thick top at the center of each end. Two 12 gauge steel figure 8 top fasteners were used at the front and back of each side to allow for wood movement in the top. One half of the clip was set into a recess cut with a forstner bit. The screw securing it into the recess in the block was left loose enough so that the clip could still pivot in the recess.
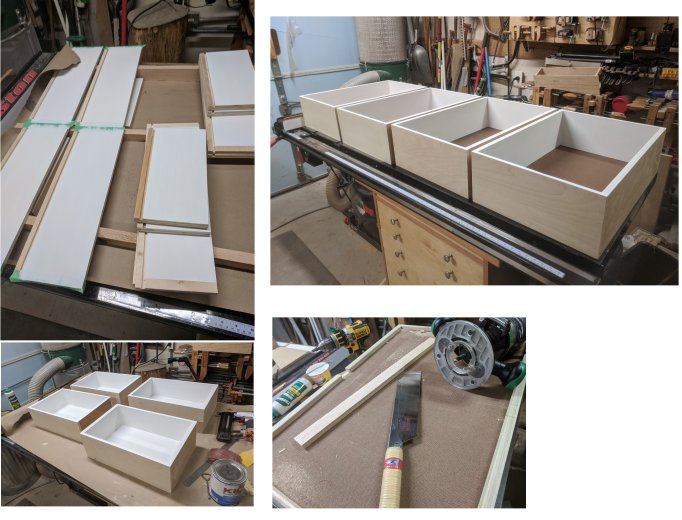
The drawers sides were made from 1/2 inch birch plywood, the front and rears from 3/4 inch plywood. I painted the insides before assembly, masking off the area at the front and back of the sides where glue would be applied during assembly. A dado was cut 1/4 inch from the bottom to house the 3/16 inch masonite bottoms. A nailer with 2 inch 16 gauge finish nails held the drawer together while the glue dried. On the underside of the middle of the wide bottom drawers, I used a hand saw to first make cuts down to the dado to accommodate a 1-1/2 inch wide oak strip, which would add additional support to the bottom. I used a router to remove the waste between the two cuts made by the hand saw. The strip was secured with glue and a screw at the front and back.
A single oak board was used to make the drawer fronts. This allows the grain pattern to flow across the front of the dresser. The oak drawer fronts were sized to fit in the drawer openings. I stacked a quarter and a dime at the bottom and sides to accomplish the spacing. After finishing the sizing cuts, glue was applied to the plywood front of the drawer, and then the 4/4 oak drawer fronts were applied and clamped. After allowing the glue to dry overnight, I added two screws to either side of the inside of the drawer into the drawer front. After all drawer fronts were installed, I checked if they were flush with the face frame. Slight inconsistencies in the positioning of the drawer slides made a couple drawers stick out a bit too far. I used a hand plane on the offending drawer fronts to bring them back into alignment before applying the stain and finish.

Headboard for Levi

Daughters always find projects for Grandpa to do. This is the saga of a headboard for Levi. Originally she wanted to use reclaimed pallet lumber, but pulling the rusted spiral nails out of pallets yielded diminishing returns. So I decided to use a 5 foot by 3 foot piece of 1/2 plywood as a substrate and attach contrasting wood species in a herring bone pattern. I started by laying out the pattern with pencil and square on the sized plywood sheet.

Daughters always find projects for Grandpa to do. This is the saga of a headboard for Levi. Originally she wanted to use reclaimed pallet lumber, but pulling rusted spiral nails out of pallets yielded diminishing returns. So I decided to use a 5 foot by 3 foot piece of 1/2 plywood as a substrate and attach contrasting wood species in a herring bone pattern. I started by laying out the pattern with pencil and square on the sized plywood sheet. I decided to make the board widths 3-1/8 inch wide to maximize some old redwood siding pieces I got from Grandpa Jake.

I started with the oak strips toward the middle of the piece. I carefully positioned the pieces using framing squares and clamps. The first row had to be right, since all the other rows would be aligned next to it. I used lead ingots to hold the boards down, and drilled and screwed up from the back side to secure the glued boards in place.

I started with the oak boards toward the middle of the piece. I carefully positioned the pieces using framing squares and clamps. The first row had to be right, since all the other rows would be aligned next to it. I used lead ingots to hold the boards down, and drilled and screwed up from the bottom side to secure the glued boards in place.

Each row was stained before being attached because some boards received a different stain than their neighbors. I found that was easier to drill the two pilot holes from the top of the plywood sheet before placing the boards because it was easier to determine where to place them. The whole assembly was elevated above the work surface so I could then counter-sink the holes and drive the screws in from below.

Each row was stained before being attached because some boards received a different stain than their neighbors. I found that was easier to drill the two pilot holes from the top of the plywood sheet before placing the boards because it was easier to determine where to place them. The whole assembly was elevated above the work surface so I could then counter-sink the holes and drive the screws in from below.

Here we are just over half done. Notice that the adjacent rows are different thickness to give  the pattern some depth. I used a 45 deg chamfer bit in the router table to give a consistent edge. It also hides inconsistencies if any of the boards were not perfectly flat.

Here we are just over half done. Notice that the adjacent rows are different thickness to give the pattern some depth. I used a 45 deg chamfer bit in the router table to give a consistent edge. It also hides inconsistencies if any of the boards were not perfectly flat.

All board pieces were cut a little long so they hung over the edge. Before adding the pieces on the other side of the beginning row, I trimmed all the boards on the just completed long side while I had the straight plywood edge on the other side to place against the table saw fence.

All board pieces were cut a little long so they hung over the edge. Before adding the pieces on the other side of the starting row, I trimmed all the boards on the just completed long side while I had the straight plywood edge on the other side to place against the table saw fence.

A 1-1/2 inch oak frame was added on the edges after completing the pattern. Glue was applied to the edges, then the oak boards were positioned to stand just a bit proud above the thickest boards in the herring bone pattern. Wood species used in the pattern were oak, western red cedar, white pine (stained grey), redwood, and aromatic cedar.

A 1-1/2 inch oak frame was added on the edges after completing the pattern. Glue was applied to the edges, then the oak boards were positioned to stand just a bit proud above the thickest boards in the herring bone pattern. Pipe clamps and brads were used to secure the trim until the glue dried overnight. Two coats of oil-based polyurethane were applied, with a light sand in-between coats. Wood species used in the pattern were oak, western red cedar, white pine (stained grey), redwood, and aromatic cedar.

Two 2x4 screwed on the back side of the headboard at each end to position the head board 2 feet above the floor. Two holes were drilled at the bottom of the 2x4 to attach them to the bed frame with 5/16 inch carriage bolts.

Two 2×4 screwed on the back side of the headboard at each end to position the head board 2 feet above the floor. Two holes were drilled at the bottom of the 2×4 to attach them to the bed frame with 5/16 inch carriage bolts.

Here you can see the colors a bit better.

Here you can see the colors a bit better.