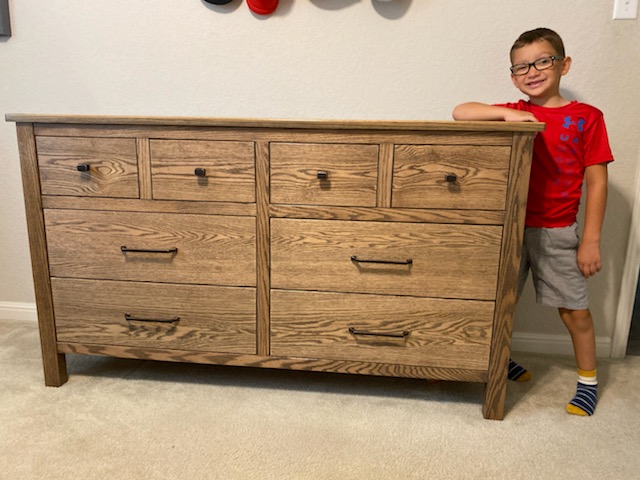
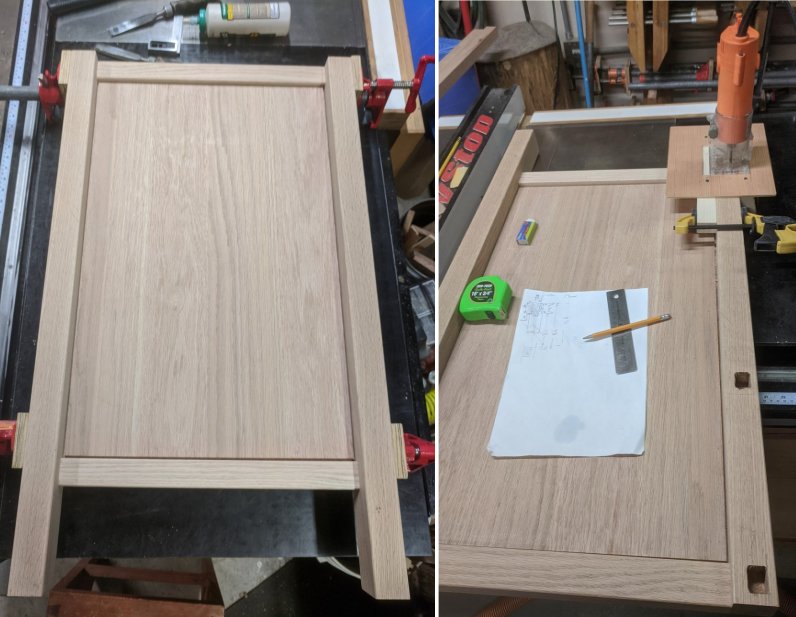
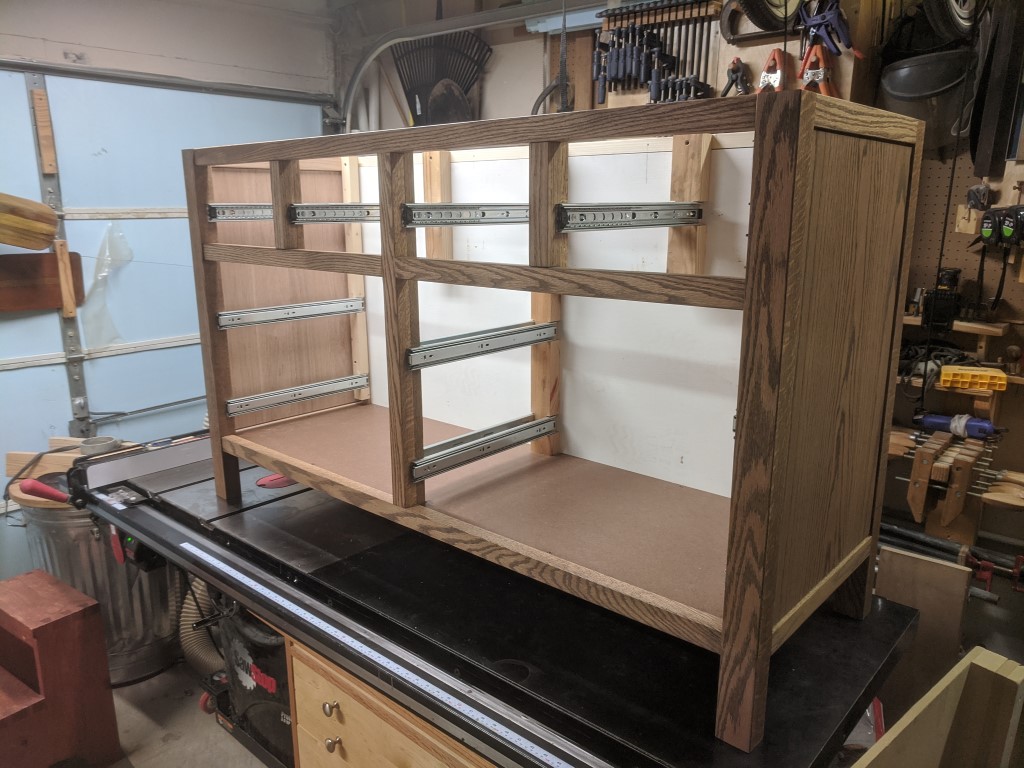
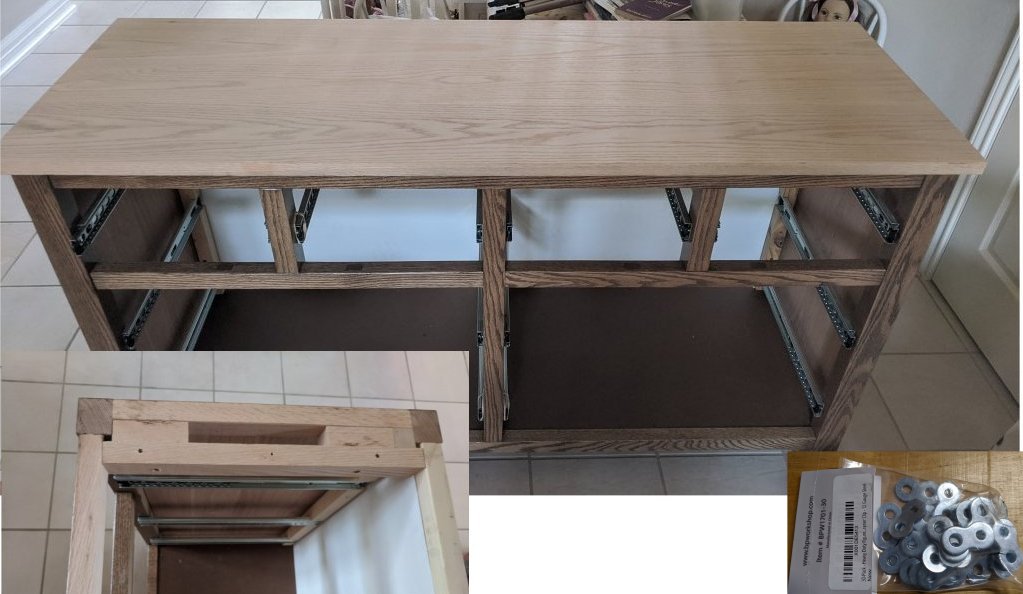
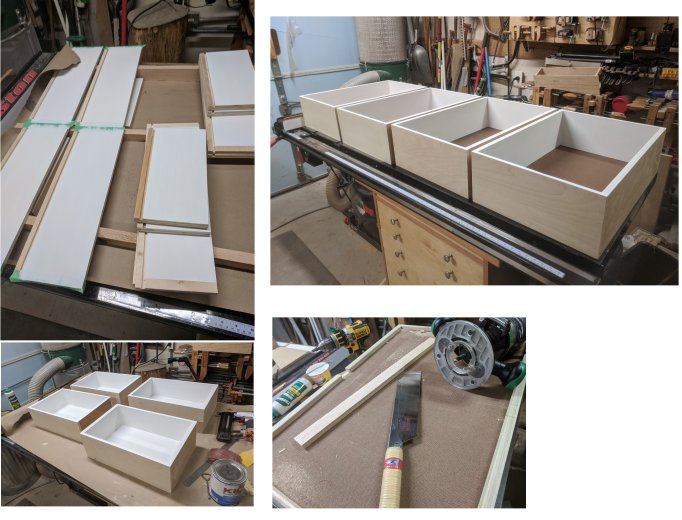
This is very similar to one I built for Little C, except that I extended the posts on the sides to the floor to double as legs. The stain used is 1 part MinWax Provincial to 5 parts MinWax Classic Gray. The front and sides are protected with 3 coats of MinWax Spar Urethane. The top has 5 coats of Varathane Ultimate polyurethane.The side panels were constructed first. Vertical posts are 8/4 red oak. Horizontal rails are 6/4 red oak. They are jointed with mortise and tenon. A dado connects the mortises to house the tongues of the solid 4/4 red oak panels. A pin on the back side thru the center of the rail and into the panels holds the panel centered in the dado with space to expand and contract with humidity changes.Here is the assembled carcase. Notice the southern yellow pine slide supports at the back. Dados cut into the sides house the the rear of the slides. Pan-head screws at the front of the 100 pound full extension slides are driven into oak added at the rear of the 6/4 mortise and tenon face frame. The back is 1/2 inch birch plywood, set into rabbets cut into the popular 6/4 full width rails. The southern pine supports are secured to the popular rails at the top and to the plywood at the bottom. The floor is 3/16 inch masonite set into a rabbet in the back, and supported by pine braces attached to the oak frame at the front and sides.The top extends past the sides about 1 inch, past the front rail 1/2 inch, and is flush at the rear. Oak blocks were added at each side to allow fastening the top with adequate clearance from the slides at each end. A single 2-1/2 inch screw was run up into the 1 inch thick top at the center of each end. Two 12 gauge steel figure 8 top fasteners were used at the front and back of each side to allow for wood movement in the top. One half of the clip was set into a recess cut with a forstner bit. The screw securing it into the recess in the block was left loose enough so that the clip could still pivot in the recess.The drawers sides were made from 1/2 inch birch plywood, the front and rears from 3/4 inch plywood. I painted the insides before assembly, masking off the area at the front and back of the sides where glue would be applied during assembly. A dado was cut 1/4 inch from the bottom to house the 3/16 inch masonite bottoms. A nailer with 2 inch 16 gauge finish nails held the drawer together while the glue dried. On the underside of the middle of the wide bottom drawers, I used a hand saw to first make cuts down to the dado to accommodate a 1-1/2 inch wide oak strip, which would add additional support to the bottom. I used a router to remove the waste between the two cuts made by the hand saw. The strip was secured with glue and a screw at the front and back.A single oak board was used to make the drawer fronts. This allows the grain pattern to flow across the front of the dresser. The oak drawer fronts were sized to fit in the drawer openings. I stacked a quarter and a dime at the bottom and sides to accomplish the spacing. After finishing the sizing cuts, glue was applied to the plywood front of the drawer, and then the 4/4 oak drawer fronts were applied and clamped. After allowing the glue to dry overnight, I added two screws to either side of the inside of the drawer into the drawer front. After all drawer fronts were installed, I checked if they were flush with the face frame. Slight inconsistencies in the positioning of the drawer slides made a couple drawers stick out a bit too far. I used a hand plane on the offending drawer fronts to bring them back into alignment before applying the stain and finish.
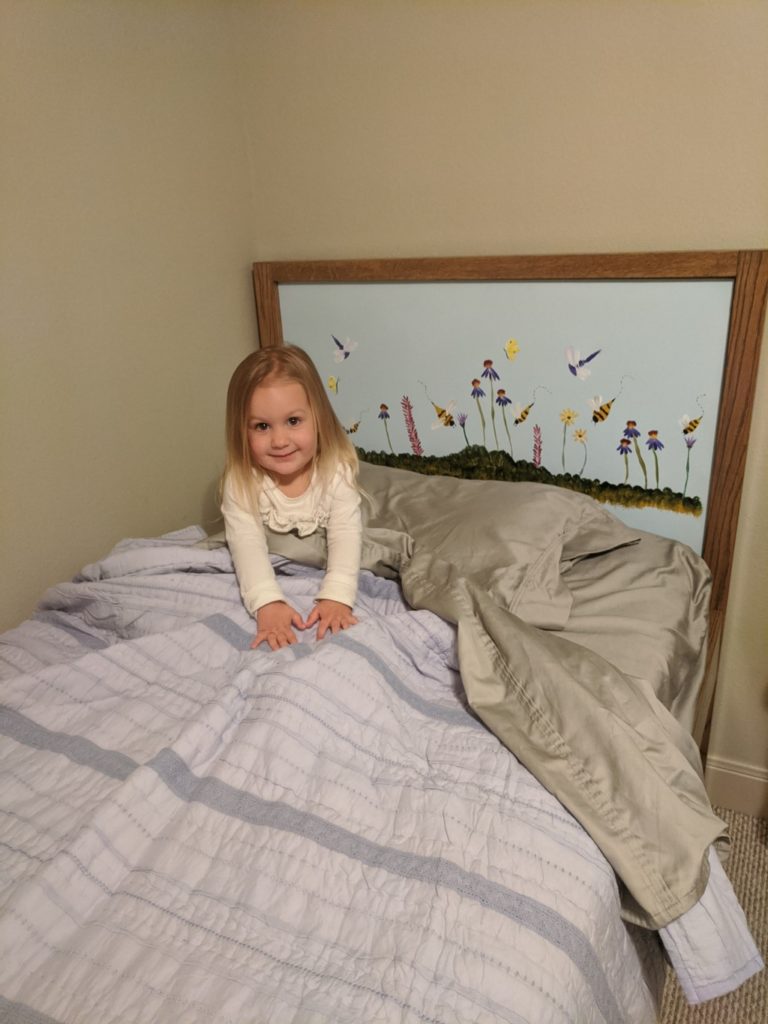
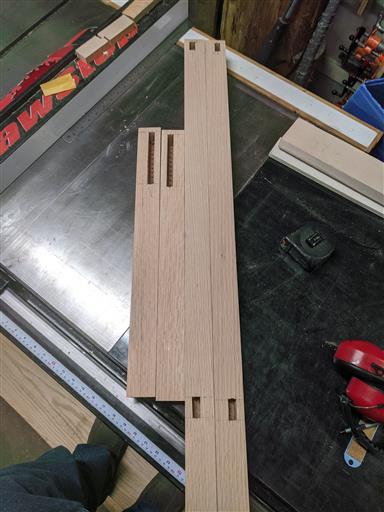
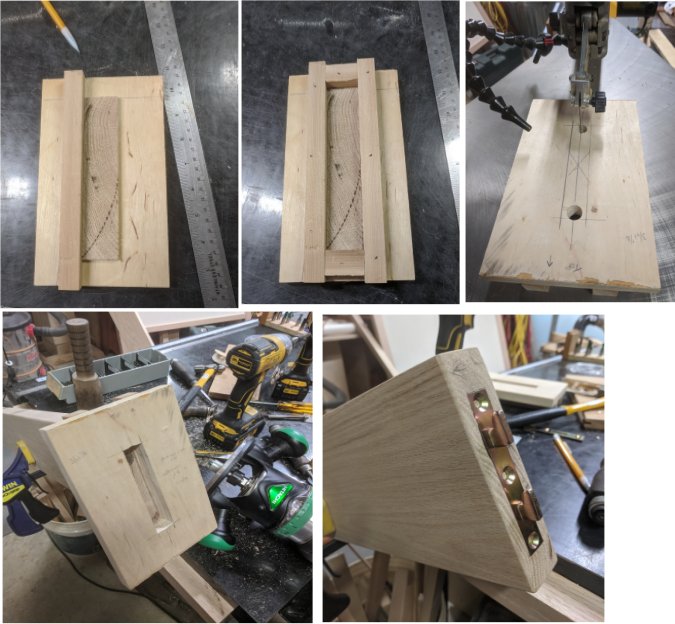
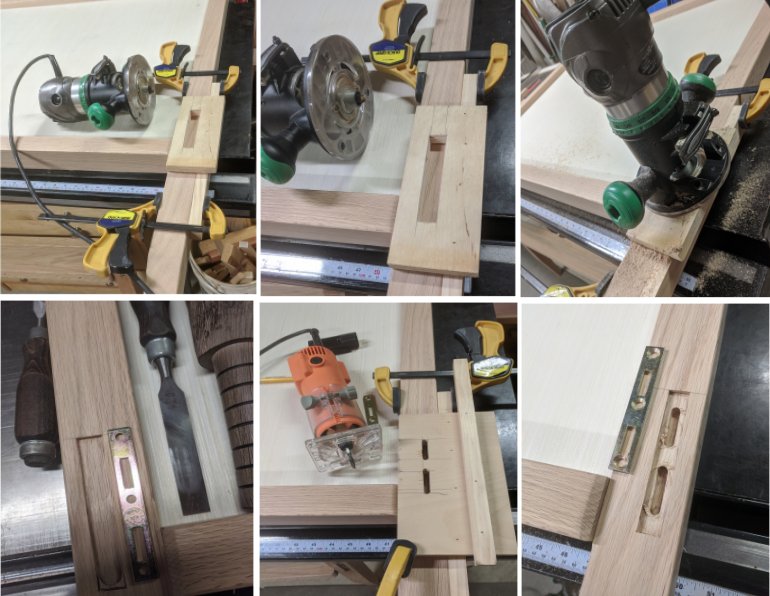
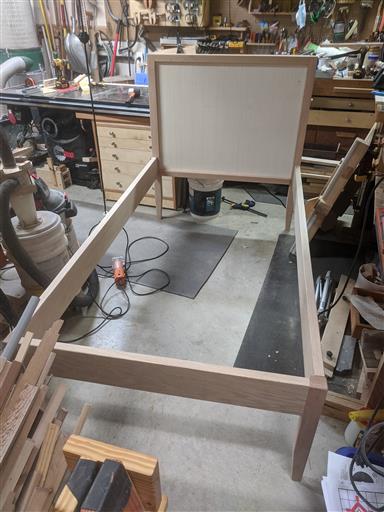
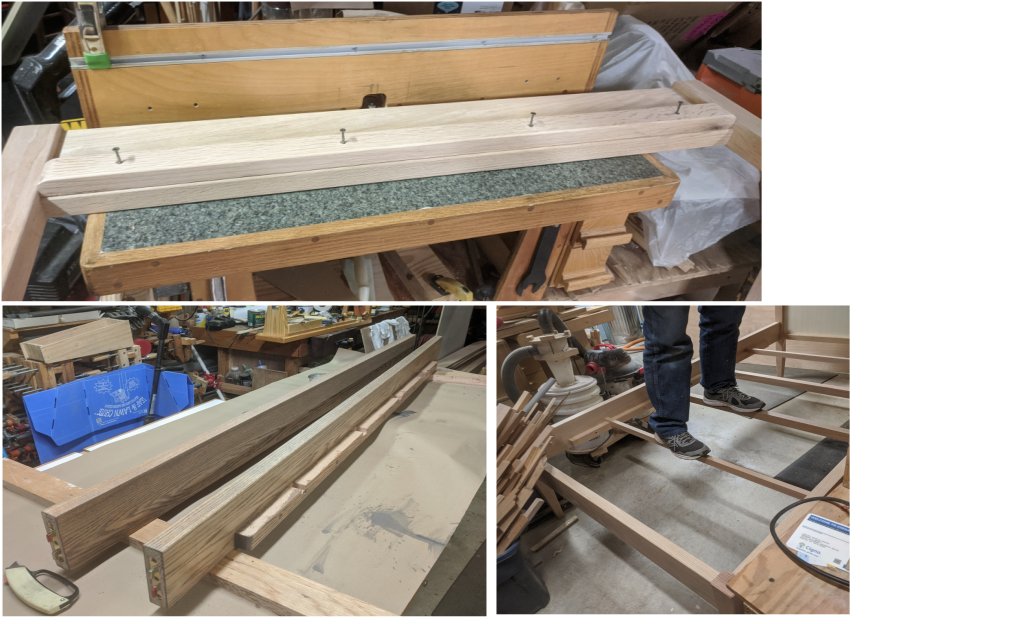
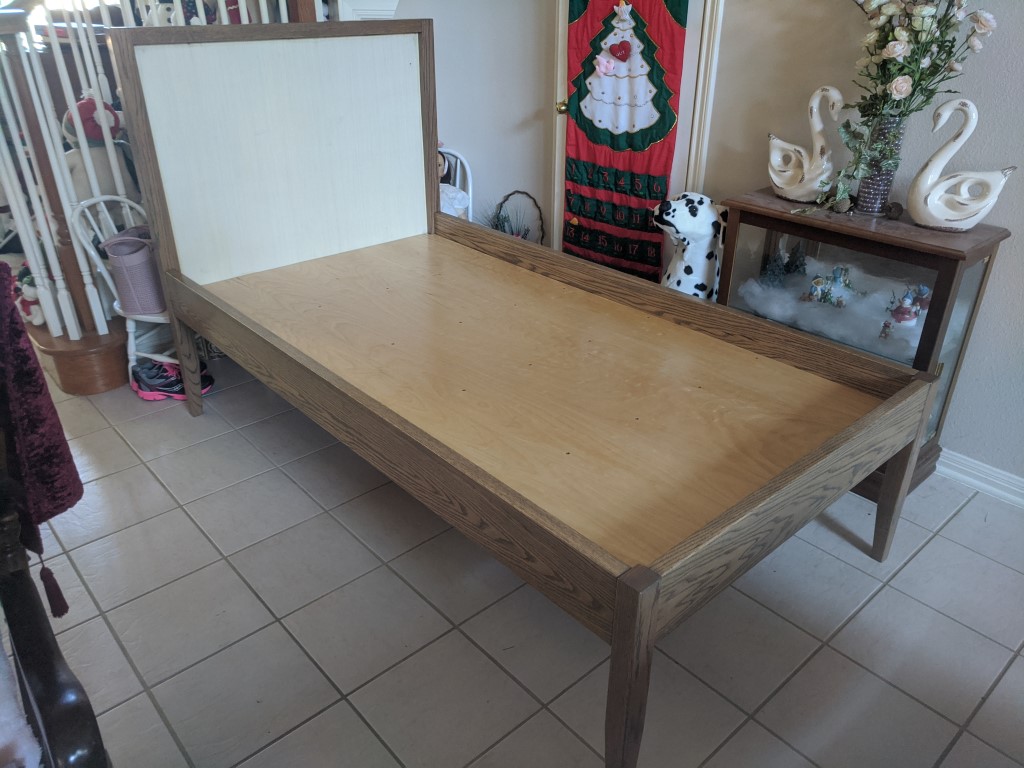
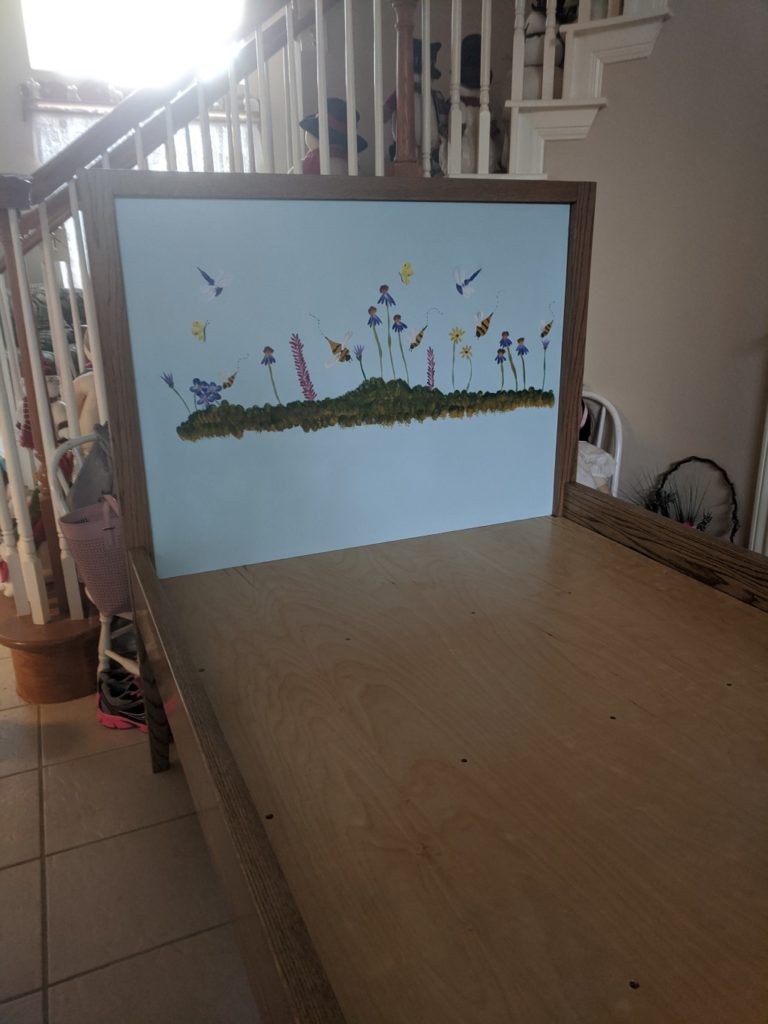
Here is a sturdy twin bed for my granddaughter. The bottom of the rails are 16 inches above the floor to allow storage containers to be stored underneath. The headboard has an insert which can be changed out she grows older and her tastes mature.I started with the corner posts. The mortises are for the foot board and the headboard frame.Here you can see the dados for 1/2 inch birch plywood that is placed in the headboard frame. It provides a backing for removable inserts. The legs have a 8-1/2 inch taper.I used bed rail hardware from Rockler to allow the bed to be disassembled and moved. To make the installation of the hardware easy, I constructed router jigs. I used a cutoff from one of the bed rails to make a frame which allows the jig to fit over the end of the rail. On the other side, I laid out a slot the width of the router bushing to cut the recess for hook portion of the rail hardware.I make two similar jig for the posts. One for the recess of the female hardware component, and the other to cut the slots in which the male hooks from the rail would reside.Here is the basic frame assembled. The hooks are tapered and tighten up as they engage. I was very impressed at how sturdy the frame was.I added supports to the rails and footboard on which the 1/2 inch plywood bottom would rest. The top of the bottom lower rail on the headboard provides the support on that end of the bed. I used 4/4 oak cross supports that fit into the notches on the rail sides. As you can see, they easily support my weight with minimal deflection. I attached the oak strips to the bottom of the plywood bottom with glue and screws to further increase the rigidity of the plywood.Here you can see the plywood bottom inserted. I finished it with two coats of polyurethane so the mattress and sheets would not snag.Here the headboard insert has been installed inside the perimeter of the headboard. It is 5-mm plywood on which Nana painted a scene favored by little girls. It is held in place with two small screws in-obtrusively placed within the painting. As mentioned above, this can be replaced at some time in the future to meet the tastes of the growing child.